

Building AWS Lambda Function using bitbucket pipeline


In this article, we are discussing AWS lambda functions build with Bitbucket Pipelines.
Bitbucket Pipelines:
Bitbucket Pipelines is an integrated CI/CD service, built into Bitbucket. It allows you to automatically build, test and even deploy your code based on a configuration file in your repository. Essentially, containers are created in the cloud and inside these containers, you can run commands (similar to how you might on a local machine) but with all of the advantages of a fresh system that is configured for your needs.
Overview
In our previous article we had discussed how we can create the.Net6.0 Lambda function using visual studio code. In this article, we will discuss how we can build the lambda using bitbucket pipelines.
We can categorise the work into several stages.
- Create a bitbucket repository and push the source code into that repo.
- Create a bitbucket pipeline using a yml template to build the project.
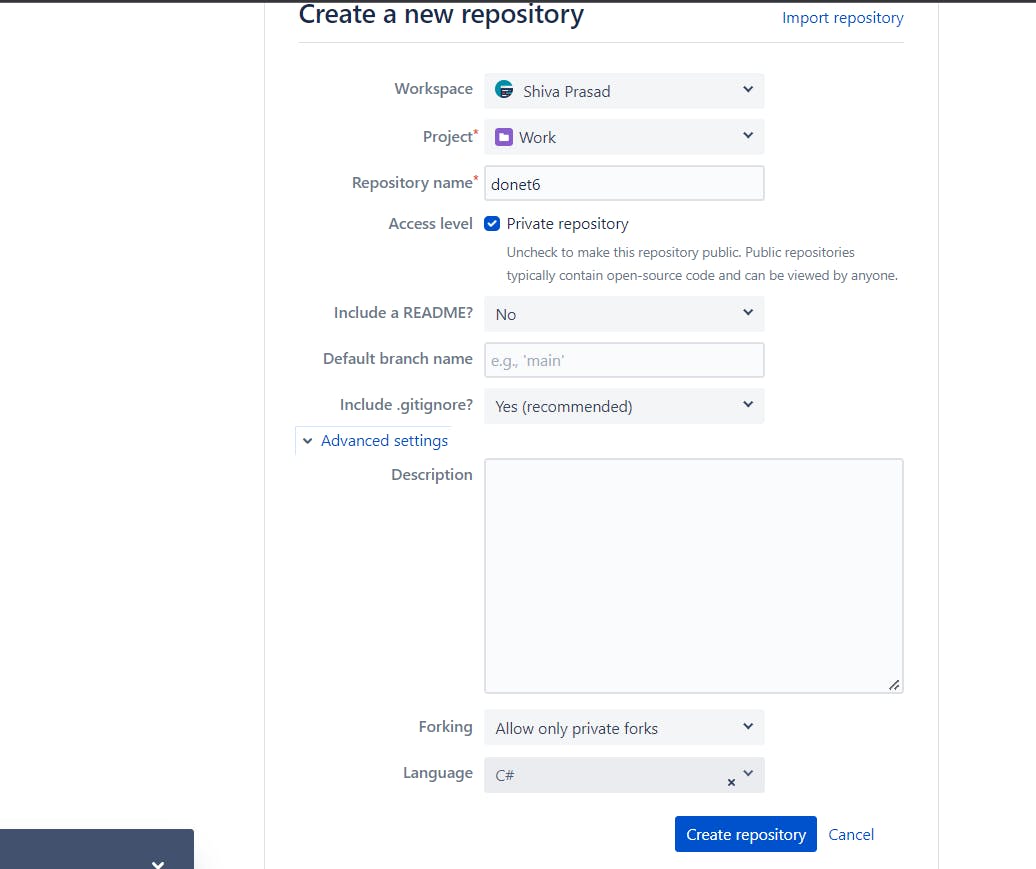
Create a bitbucket repository and push the source code into that repository.
Login to bitbucket, click on create a repository and fill in the relevant details. As shown in the below screenshot.
Clone the newly created repository and copy the .net6 project files which had been created in the previous article. Push the local changes to the bitbucket server. We can do it in the following steps
- Cloning the repository (
git clone https://xxxx@bitbucket.org/xxx/dotnet6.git) - Create a git ignore file (
dotnet new gitignore) - Copy the project files
- Commit and Push the changes to the bitbucket server (
git push)
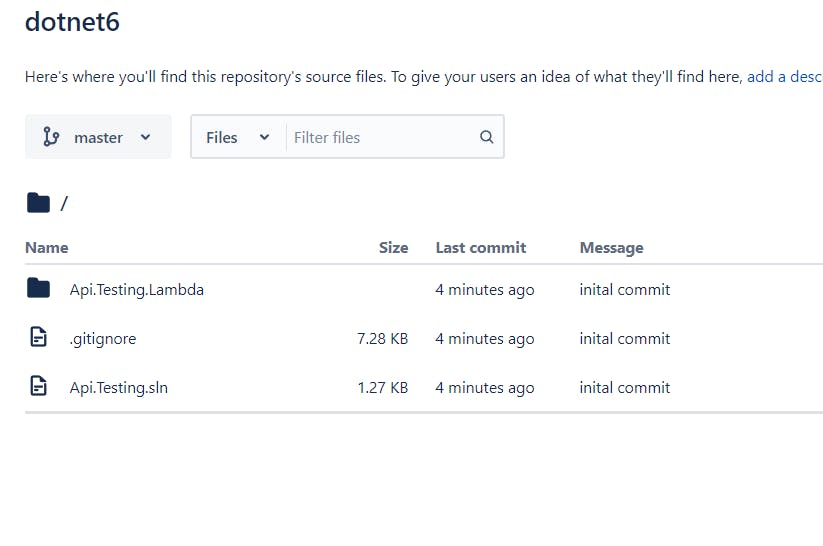
After pushing the changes we can see the files in the bitbucket server.
Create bitbucket pipeline using yml template to build project.
To set up Bitbucket Pipelines, you need to first create and configure the bitbucket-pipelines.yml file in the root directory of your repository.
Enable pipelines in bitbucket
- Step 1 : Login to bitbucket and select the repository
- Step 2 : Make sure pipelines are enabled
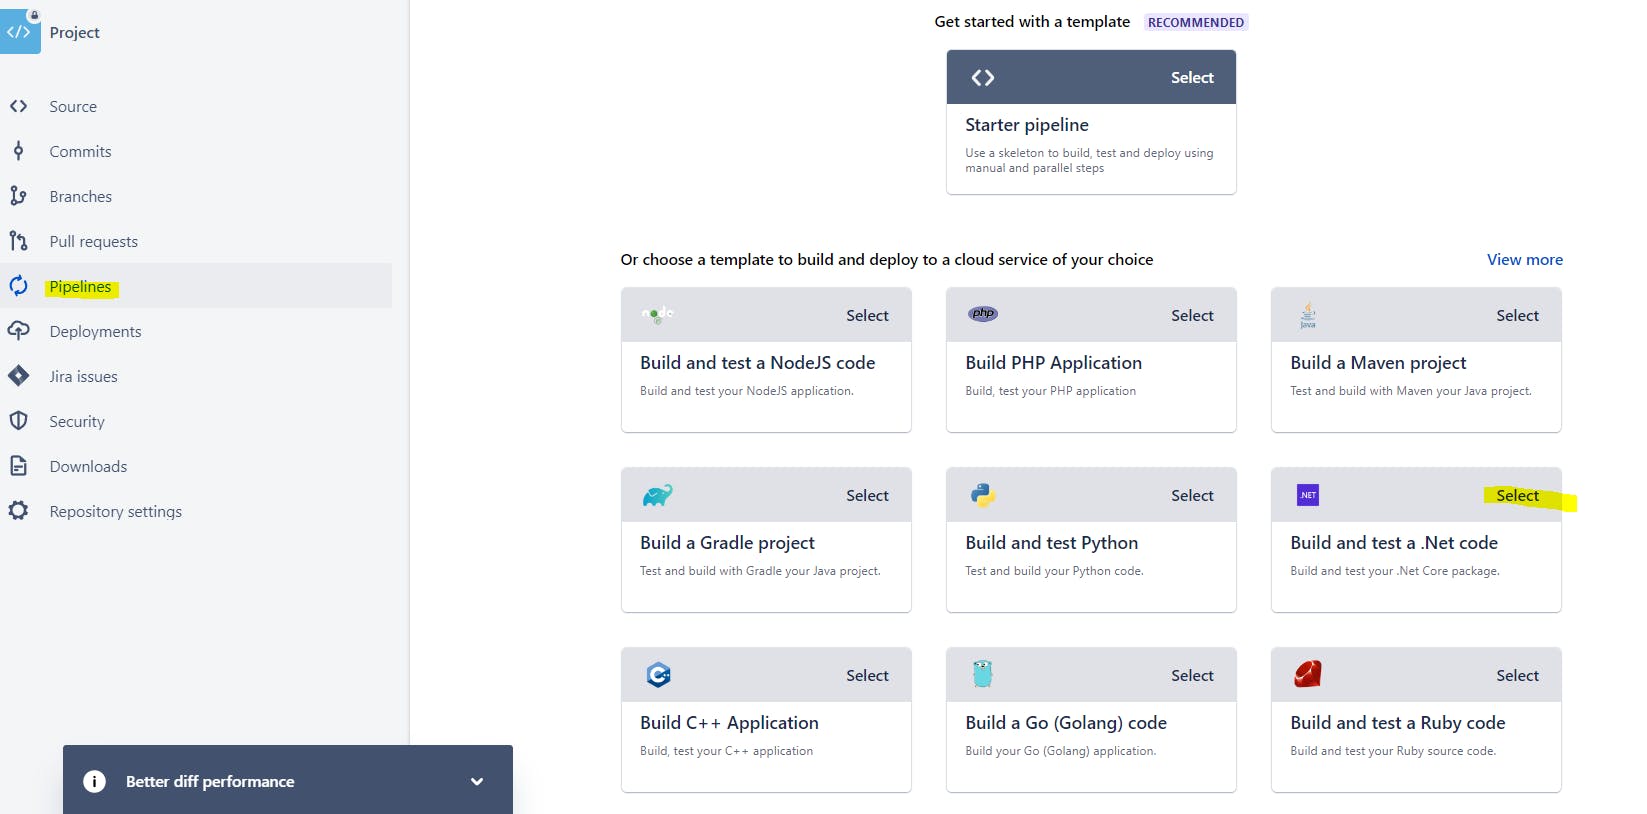
- Step 3 : Go to Pipelines
- Step 4 : Select the template dotnet template.
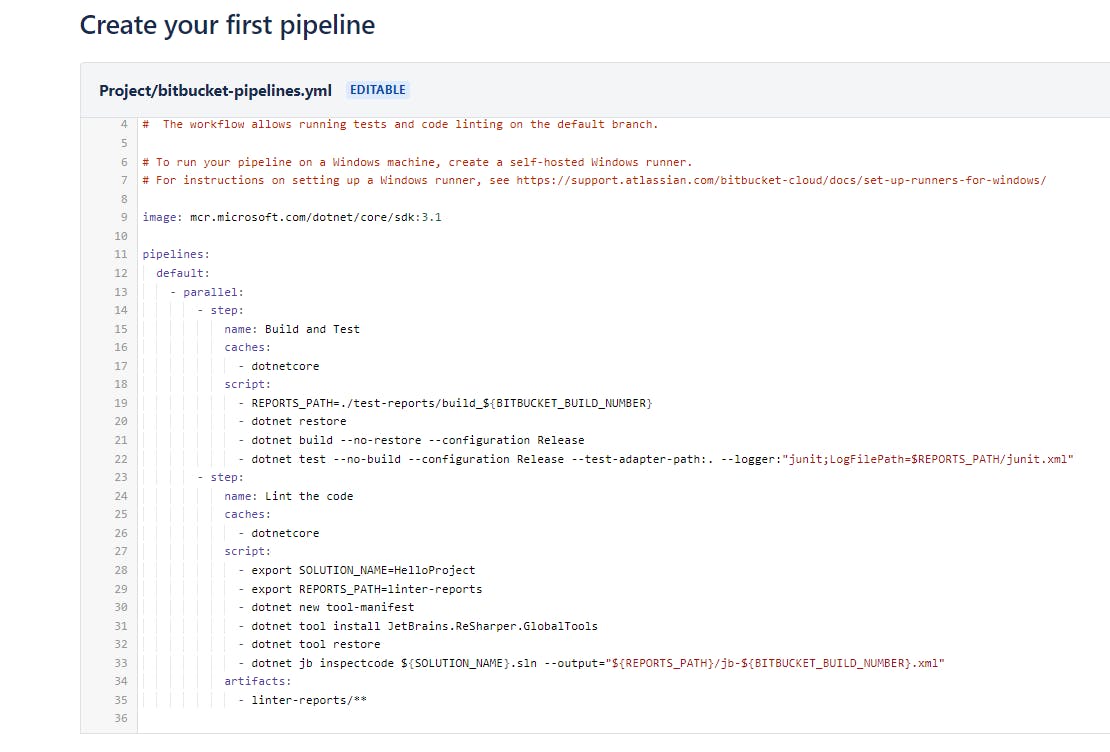
Step5: Made the changes to the pipeline to build .Net6 application

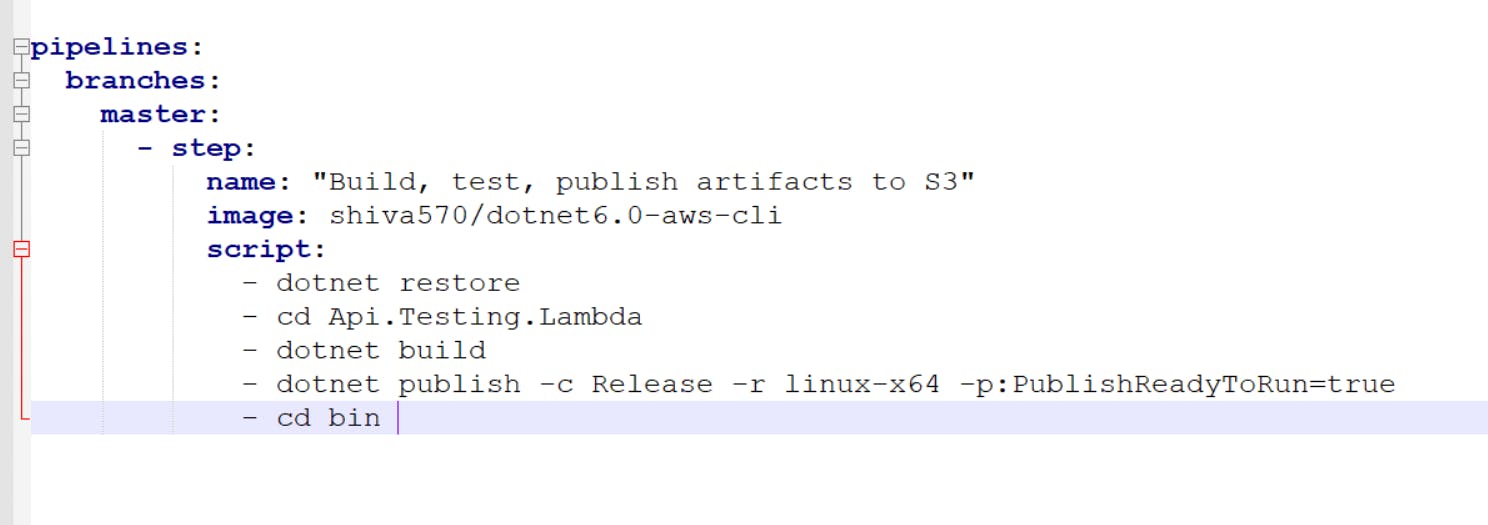
Explanation of the above sample script
Here we use docker image which will support .Net 6.0 and AWS tools, which were required to build the .net 6.0 project and deploys to AWS.
When we push the changes to master, pipelines will be triggered. It downloads the image and creates the container in the bitbucket host. Then builds the application and publishes contents to the release folder.
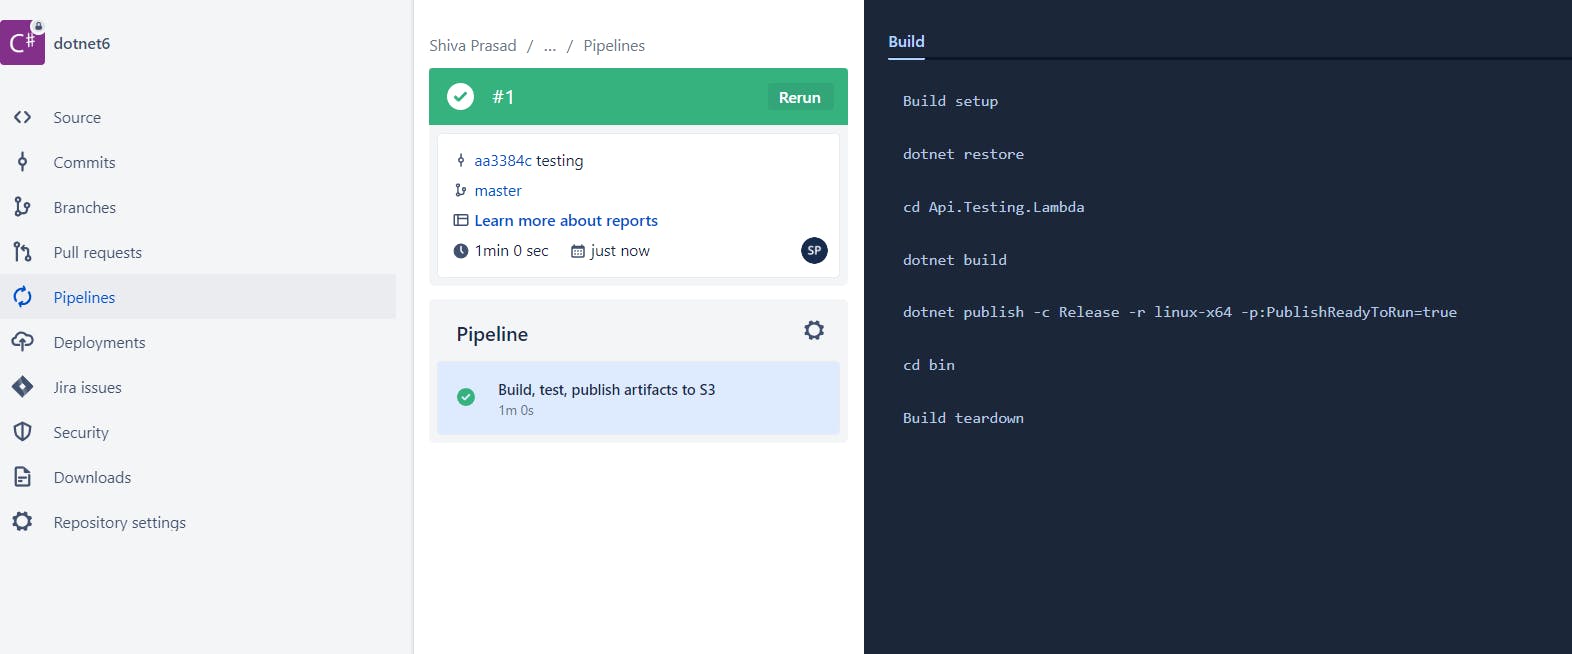
final outcome of the pipeline
In the next article, we will discuss how to deploy Lambda function to AWS